Thank you Lisa for the kind words :) I'll go through a couple of the images I showed in class yesterday, in terms of optimizing and such.
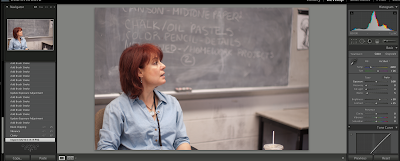
 Here's the photo of my drawing teacher that I showed yesterday-- this is it right out of the camera. It had a pretty good exposure to begin with, so I started with adjusting the white balance and adding some blacks and clarity to give it the subject better separation from the background. I sharpen and reduce noise, then will generally make a slight curves adjustment and adjust the brightness some. Like Patti says, set your whites and blacks first, and then work everything in between mainly using gamma.
After that, for this image, I started working with the adjustment brush to tonally adjust specific areas in the picture. I opened up the dark areas of her hair, added highlights to the skin, contrast to the folds in the clothing, and brought down the exposure of the blackboard. I use this tool a lot to enhance the natural textures in the scene. I think a lot about painting and drawing when I do this.
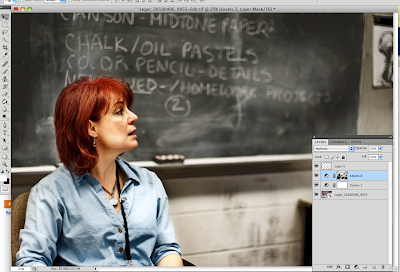
 At this point, I opened the image as a smart object in Photoshop to start proofing it for work prints. The file was a little too magenta for the substrate I was going to, so I made a curves adjustment layer, added a very slight s-curve in the shadow/midtone areas on the master channel, and then went into each of the RGB channels, set a midpoint and adjusted each of them very slightly to make it more balanced (in fact, looking at it on my screen at home, it looks a little too green now...).
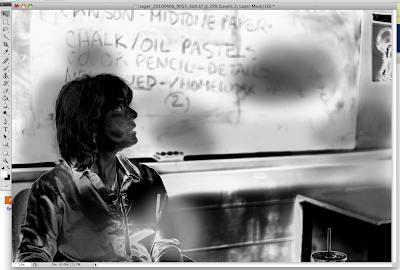
Patti has made me realize that a lot of times I don't give my images nearly enough density to bring out the tonal richness already there. You don't want to clip out all your blacks, but it is nice to have some true dark values. A similar result could have been achieved earlier in Lightroom, but I used an empty Levels layer set to multiply. Before I added the layer though, I used color range to select the midtones and shadows-- so that when I added the Levels layer, skin and other parts of the image would already be masked off, since I really just wanted to burn in the blackboard and textured areas of the image.
 Lastly, I just used the clone stamp on an empty layer to get rid of that soda cup in the bottom right corner. I had some wider shots where the clutter on her desk looked nice, but that one soda cup didn't really work.
Also, since I was working with a smart object, I used the unsharp mask as a smart filter; smart filters are nice because they work like a layer mask, and you can go back and edit them depending on what different surfaces you may be printing to, what areas you want to be sharper, etc.
On to self portraits....
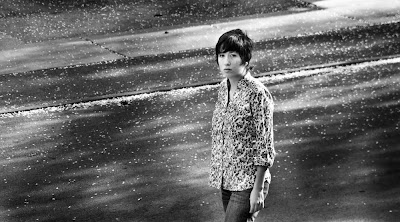
 I really struggle with self portraits. I admire people that are able to do this as part of a daily routine, like brushing teeth. I also have trouble with focusing and things that are much easier to do when you're behind the camera. It's a challenge to compose, light, and focus on yourself; the only thing I can really say is that it does get easier with practice somehow. Using greater depth of field or placing another person or an object where you will be and pre-focusing can help. Honestly this picture is far from perfect-- the light and composition is nice, but I am still back-focused just a little bit and it drives me nuts. It's amazing how something simple like focusing can throw you off. It also helps to remember that, even if your lens isn't really bright, when you are all the way open, even the plane in focus will be just a little bit soft. Try stopping down to make focusing easier at first, and when you get everything else worked out, then I'd try using depth of field more creatively.
Okay, I hope I didn't bore you all to death. I've probably left out some finer points, but this is basically how I work (and Patti, feel free to chime in if I've explained something wrong or am misleading the youth). Keep in mind that this is just some technique I've found has worked nicely for my images, but it's certainly not relevant to everything. Being a big geek helps me be able to use software more intuitively, but if anything, experiment to hell with it until you don't have to think about what each little button does. Just like when we picked up cameras for the first time or went into the studio not knowing how anything worked, this is just one more part of process you have to learn. Don't think of it as some separate part that's detached from your artistry, but as a cohesive part of your developing craft.
Loved all of your advice :) I am most definitely as well someone who struggles with self portraits! but the one you have showed i love!
ReplyDelete